This shell script automates the install for zsh with oshmyzsh and theming
End product if you install the font and default theme

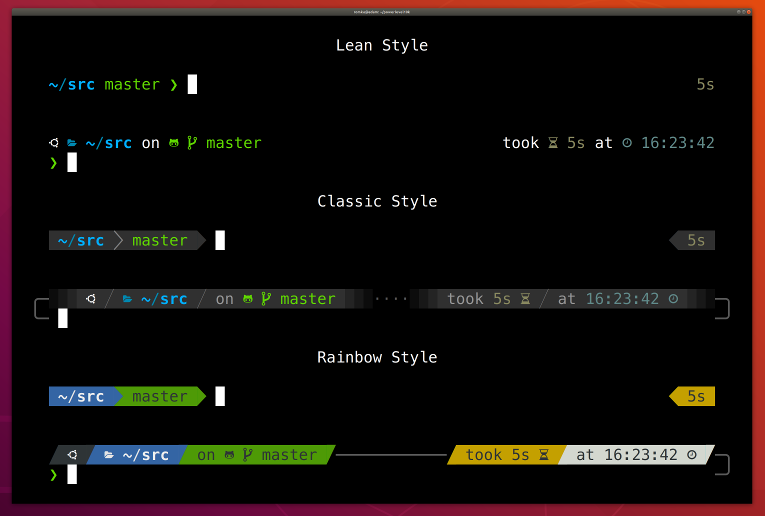
Examples of the customization
Debian based Linux, more flavors will be added at a later date
sudo apt-get install curlMac OSX with brew preinstalled information to install brew
If you are using iTerm2 or Termux, p10k configure can install the recommended font for you.
Simply answer Yes when asked whether to install Meslo Nerd Font.
If you are using a different terminal, proceed with manual font installation. 👇
Download the hacked font file:
Double-click on each file and click "Install". This will make AFC Font font available to all
applications on your system. Configure your terminal to use this font:
- iTerm2: Type
p10k configureand answerYeswhen asked whether to install Meslo Nerd Font. Alternatively, open iTerm2 → Preferences → Profiles → Text and set Font toAFC Font. - Apple Terminal: Open Terminal → Preferences → Profiles → Text, click Change under Font
and select
AFC Fontfamily. - Hyper: Open Hyper → Edit → Preferences and change the value of
fontFamilyundermodule.exports.configtoAFC Font. - Visual Studio Code: Open File → Preferences → Settings, enter
terminal.integrated.fontFamilyin the search box and set the value toAFC Font. - GNOME Terminal (the default Ubuntu terminal): Open Terminal → Preferences and click on the
selected profile under Profiles. Check Custom font under Text Appearance and select
AFC Font Regular. - Konsole: Open Settings → Edit Current Profile → Appearance, click Select Font and select
AFC Font Regular. - Tilix: Open Tilix → Preferences and click on the selected profile under Profiles. Check
Custom font under Text Appearance and select
AFC Font. - Windows Console Host (the old thing): Click the icon in the top left corner, then
Properties → Font and set Font to
AFC Font. - Microsoft Terminal (the new thing): Open Settings (
Ctrl+,), search forfontFaceand set value toAFC Fontfor every profile. - IntelliJ (and other IDEs by Jet Brains): Open IDE → Edit → Preferences → Editor →
Color Scheme → Console Font. Select Use console font instead of the default and set the font
name to
AFC Font. - Termux: Type
p10k configureand answerYeswhen asked whether to install Meslo Nerd Font. - Blink: Type
config, go to Appearance, tap Add a new font, tap Open Gallery, select AFC Font.css, tap import and typeexitin the home view to reload the font. - Terminus: Open Settings → Appearance and set Font to
AFC Font. - Terminator: Open Preferences using the context menu. Under Profiles select the General
tab (should be selected already), uncheck Use the system fixed width font (if not already)
and select
AFC Font. Exit the Preferences dialog by clicking Close. - Guake: Right Click on an open terminal and open Preferences. Under Appearance
tab, uncheck Use the system fixed width font (if not already) and select
AFC Font. Exit the Preferences dialog by clicking Close. - MobaXterm: Open Settings → Configuration → Terminal → (under Terminal look and feel)
and change Font to
AFC Font. - Asbrú Connection Manager: Open Preferences → Local Shell Options → Look and Feel, enable
Use these personal options and change Font: under Terminal UI to
AFC Font. To change the font for the remote host connections, go to Preferences → Terminal Options → Look and Feel and change Font: under Terminal UI toAFC Font. - WSLtty: Right click on an open terminal and then on Options. In the Text section, under
Font, click "Select..." and set Font to
AFC Font. - Alacritty: Create or open
~/.config/alacritty/alacritty.ymland add the following section to it:font: normal: family: "AFC Font"
- Kitty: Create or open
~/.config/kitty/kitty.confand add the following line to it:Restart Kitty by closing all sessions and opening a new session.font_family AFC Font - WezTerm: Create or open
$HOME/.config/wezterm/wezterm.luaand add the following:If the file already exists, only add the line with the font to the existing return. Also add the first line if it is not already present.local wezterm = require 'wezterm'; return { font = wezterm.font("AFC Font"), }
- urxvt: Create or open
~/.Xresourcesand add the following line to it:You can adjust the font size to your preference. After changing the configuration useURxvt.font: xft:AFC Font:size=11xrdb ~/.Xresourcesto reload the config. The new config is applied for all new terminals.
IMPORTANT: Run p10k configure after changing terminal font. The old ~/.p10k.zsh may work
incorrectly with the new font.
Using a different terminal and know how to set the font for it? Share your knowledge by sending a PR to expand the list!
Look above to install the custom font to get icons working properly and set for your terminal before you move on
Use curl to run the script.
sh -c "$(curl -fsSL https://raw.githubusercontent.com/Jeremy-Boyle/Shell-Customizer/main/custom_shell.sh)"If you are on a linux machine and your current shell is NOT zsh you will need admin rights to install zsh. The command is the same just enter your credentials when it asks
sh -c "$(curl -fsSL https://raw.githubusercontent.com/Jeremy-Boyle/Shell-Customizer/main/custom_shell.sh)"For whatever reason you want to remove this run the command bellow if you would like to keep using zsh
rm -rf ~/.zshrc ~/.oh-my-zsh/
mv ~/.zshrc.pre-oh-my-zsh ~/.zshrc
exec zsh
For linux: If you would like to uninstall and switch back to bash as the default shell you will need admin rights with the commands below
chsh -s /bin/bash $(whoami)
Note how the effect of every command is instantly reflected by the very next prompt.
| Command | Prompt Indicator | Meaning |
|---|---|---|
timew start hack linux |
⌚ hack linux |
time tracking enabled in timewarrior |
touch x y |
?2 |
2 untracked files in the Git repo |
rm COPYING |
!1 |
1 unstaged change in the Git repo |
echo 3.7.3 >.python-version |
🐍 3.7.3 |
the current python version in pyenv |
By default based on your operating system the preinstalled plugins:
Linux
plugins=(zsh-syntax-highlighting zsh-completions git kubectl aws docker history)Mac
plugins=(zsh-syntax-highlighting zsh-completions git kubectl aws brew vscode docker history osx)you can customize the plugins by adding to the correct line (see above example) within ~/.zshrc for the list of the pre installed plugins you can visit it here repo oh-my-zsh wiki
Alternatively you can run:
ls ~/.oh-my-zsh/pluginsPull requests are welcome. For major changes, please open an issue first to discuss what you would like to change.
Please make sure to update tests as appropriate.