


Key Features • Download • How To Use • Support • Contributing • Changelog • Credits & Contributors
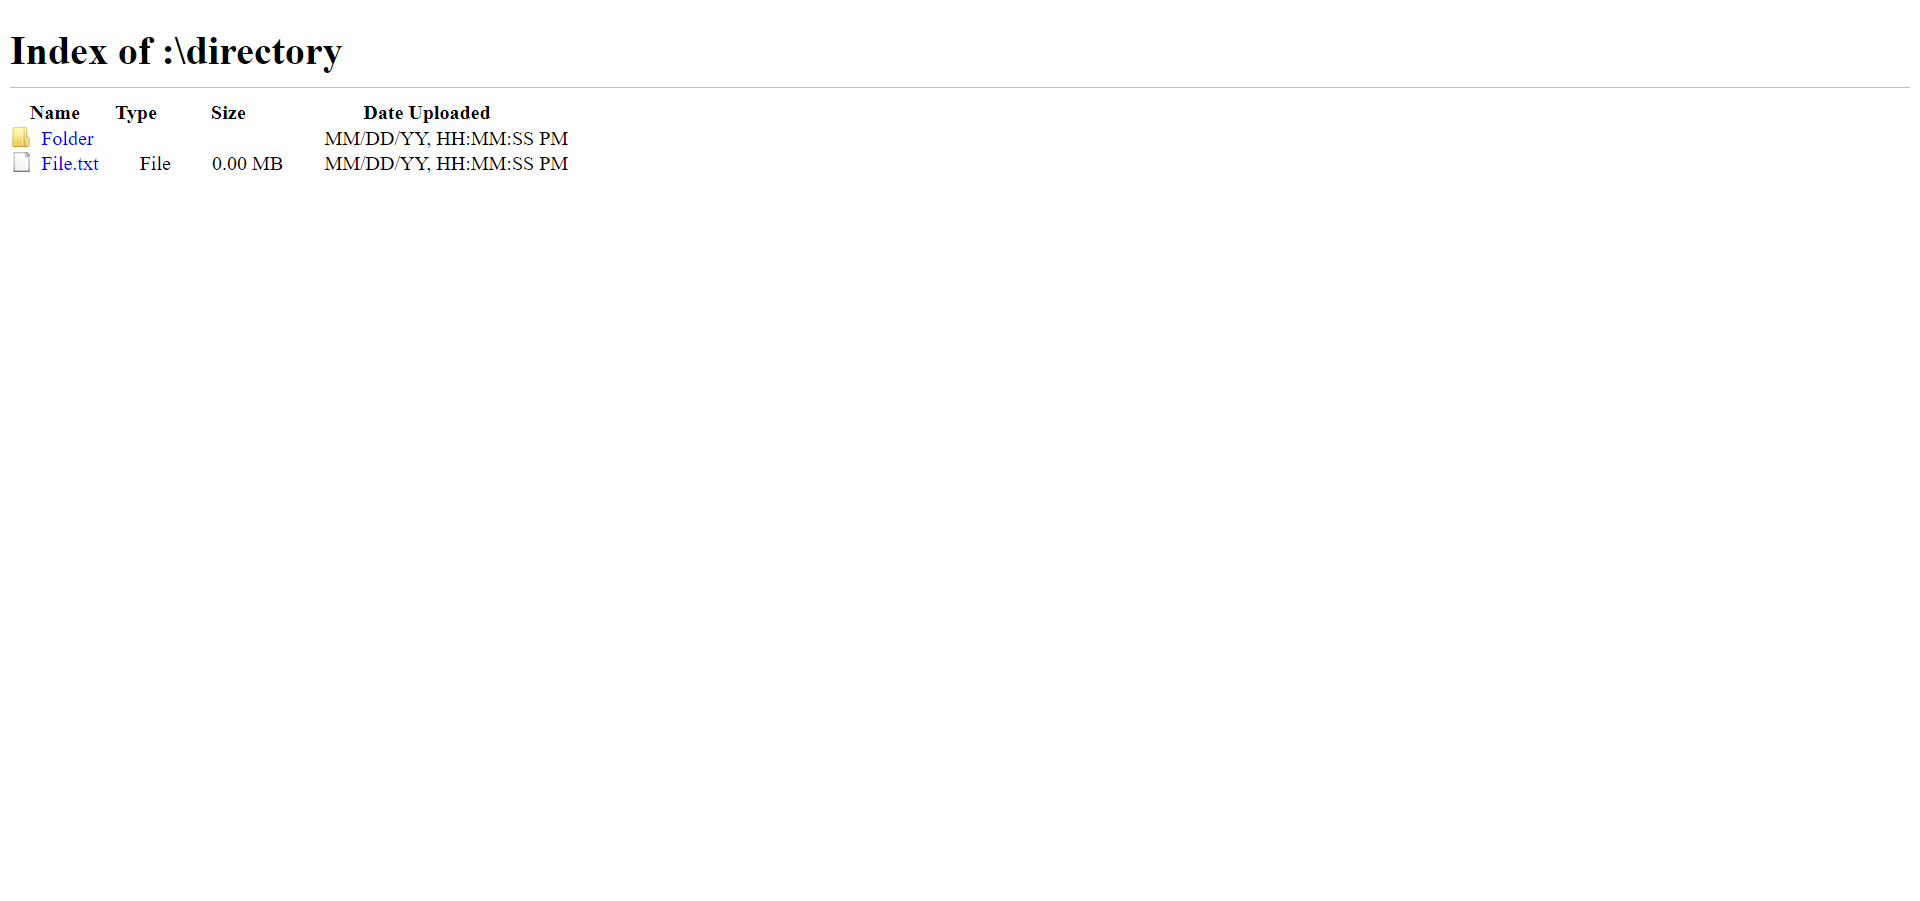
- Basic file directory view.
- Name, type, size and upload date.
- Folder and file links.
- Icons for folders and files.
- Compatible with all web servers and websites.
- Includes an automatically generated file listing.
- Cross platform.
You can download the source code to modify the code and create your own file directory page.
You can also access the production version the website, available on all platforms, here.
To clone and run this website, you'll need Git installed on your computer. If you would rather not use Git, you can just download the code from GitHub above. From your command line:
# Clone this repository
$ git clone https://github.com/willtheorangeguy/Chrome-File-Directory.git

# Go into the repository
$ cd Chrome-File-Directory

# Run the webpage
$ index.html
You can also pull the Docker image from GitHub Packages. From your command line:
# Pull image
$ docker pull ghcr.io/willtheorangeguy/chrome-file-directory:main

# Run container
$ docker run -d -p 8000:80 ghcr.io/willtheorangeguy/chrome-file-directory:main

# Now, navigate to localhost in your browser to see the webpage
However, to make this your own directory, either use the index_chromium.html file to create a self generating directory - or use the index.html file to create a custom directory listing with custom links.
-
If you would rather have the styling for the page in its own separate location, copy the
style.cssfile to that location and link it in the top of theindex.htmlfile. More instructions can be found in CUSTOMIZATION. -
Line 69: Update the
exampleplaceholder text between the<title>tags with the actual directory name. This will be the title of the webpage.
<title id="title">Index of example</title>- Line 73: Update the
:\directoryplaceholder text between the<h1>tags with the actual directory path. This will be the title displayed on the page.
<h1 id="header">Index of :\directory</h1>- Line 74: If this is a directory inside of another directory, remove the
style="display:none"placeholder in thedivtag.
<div id="parentDirLinkBox" style="display:none"></div>- Line 75: If this is a directory inside of another directory, change the
up/levelplaceholder in thehref="..."tag with the actual link to the folder above.
<a id="parentDirLink" href="up/level" class="icon up"></a>- When you have customized the title, and added folder and file listings following the tutorials below, save the files and upload them to your web server.
- You're all set!
<tr>
  <td data-value="Folder">
    <a class="icon dir" href="link/to/folder">Folder</a>
  </td>
  <td class="detailsColumn" data-value="0"></td>
  <td class="detailsColumn">MM/DD/YY, HH:MM:SS PM</td>
</tr>- Replace the
"Folder"placeholder value (between thedata-value="..."tag) with the real name of the folder. - Replace the
"link/to/folder"link (between thehref="..."tag) with the actual link to the folder. - Replace the
Folderplaceholder name (between the<a>...</a>tag) with the real name of the folder. - Replace the
MM/DD/YY, HH:MM:SS PMplaceholder date with the date the folder was uploaded. - Add more of these rows as necessary.
<tr>
  <td data-value="File">
    <a class="icon file" draggable="true" href="link/to/file">File.txt</a>
  </td>
  <td class="detailsColumn">File</td>
  <td class="detailsColumn">0.00 MB</td>
  <td class="detailsColumn">MM/DD/YY, HH:MM:SS PM</td>
</tr>- Replace the
"File"placeholder value (between thedata-value="..."tag) with the real name of the file. - Replace the
"link/to/file"link (between thehref="..."tag) with the actual link to the file. - Replace the
File.txtplaceholder name (between the<a>...</a>tag) with the real name and extension of the file. - Replace the
Fileplaceholder text with the actual file type. - Replace the
0.00 MBplaceholder size with the real size of the file. - Replace the
MM/DD/YY, HH:MM:SS PMplaceholder date with the date and time the file was uploaded. - Add more of these rows as necessary.
Further customization options for different types of files and folder structures can be found in CUSTOMIZATION. More documentation is available in the Documentation and on the Wiki. If more support is required, please open a GitHub Discussion or join our Discord.
Please contribute using GitHub Flow. Create a branch, add commits, and open a pull request.
Please read CONTRIBUTING for details on our CODE OF CONDUCT, and the process for submitting pull requests to us.
See the CHANGELOG file for details.
This software uses the following open source packages, projects, services or websites:
 |
 |
||
|---|---|---|---|
| GitHub | W3C | W3Schools | Chromium |
| Web - Plans | Web - Donate | Web - Pro | Web |
- @willtheorangeguy - Sponsor on PayPal
- Running Calculator - A running speed calculator for any unit of distance.
- PyWorkout - A minimal CLI to keep you inspired during your workout! Easily used and customized, with support for multiple workout plans, different muscle groups and video workouts.
- PyAvatar - Easily display all of your creative avatars to keep them consistent across websites.
The website code in this repository is created by the Chromium Development Team and maintained by Google. The browser is released under the BSD 3-Clause License, and this project follows those licensing guidelines.
This project is licensed under the BSD 2-Clause “Simplified” License - see the LICENSE file for details. See the Privacy Policy and Terms and Conditions for legal information.